Let’s talk about pressure decay. It’s one of the most widely used methods for leak testing, and honestly, it still earns its place. At VES, we see firsthand how reliable and cost-effective it can be, especially in production environments where consistency really matters. Yes, tracer gas methods like helium and hydrogen are becoming more popular, but Pressure Decay Method isn’t going anywhere anytime soon.
What Is the Pressure Decay Method?
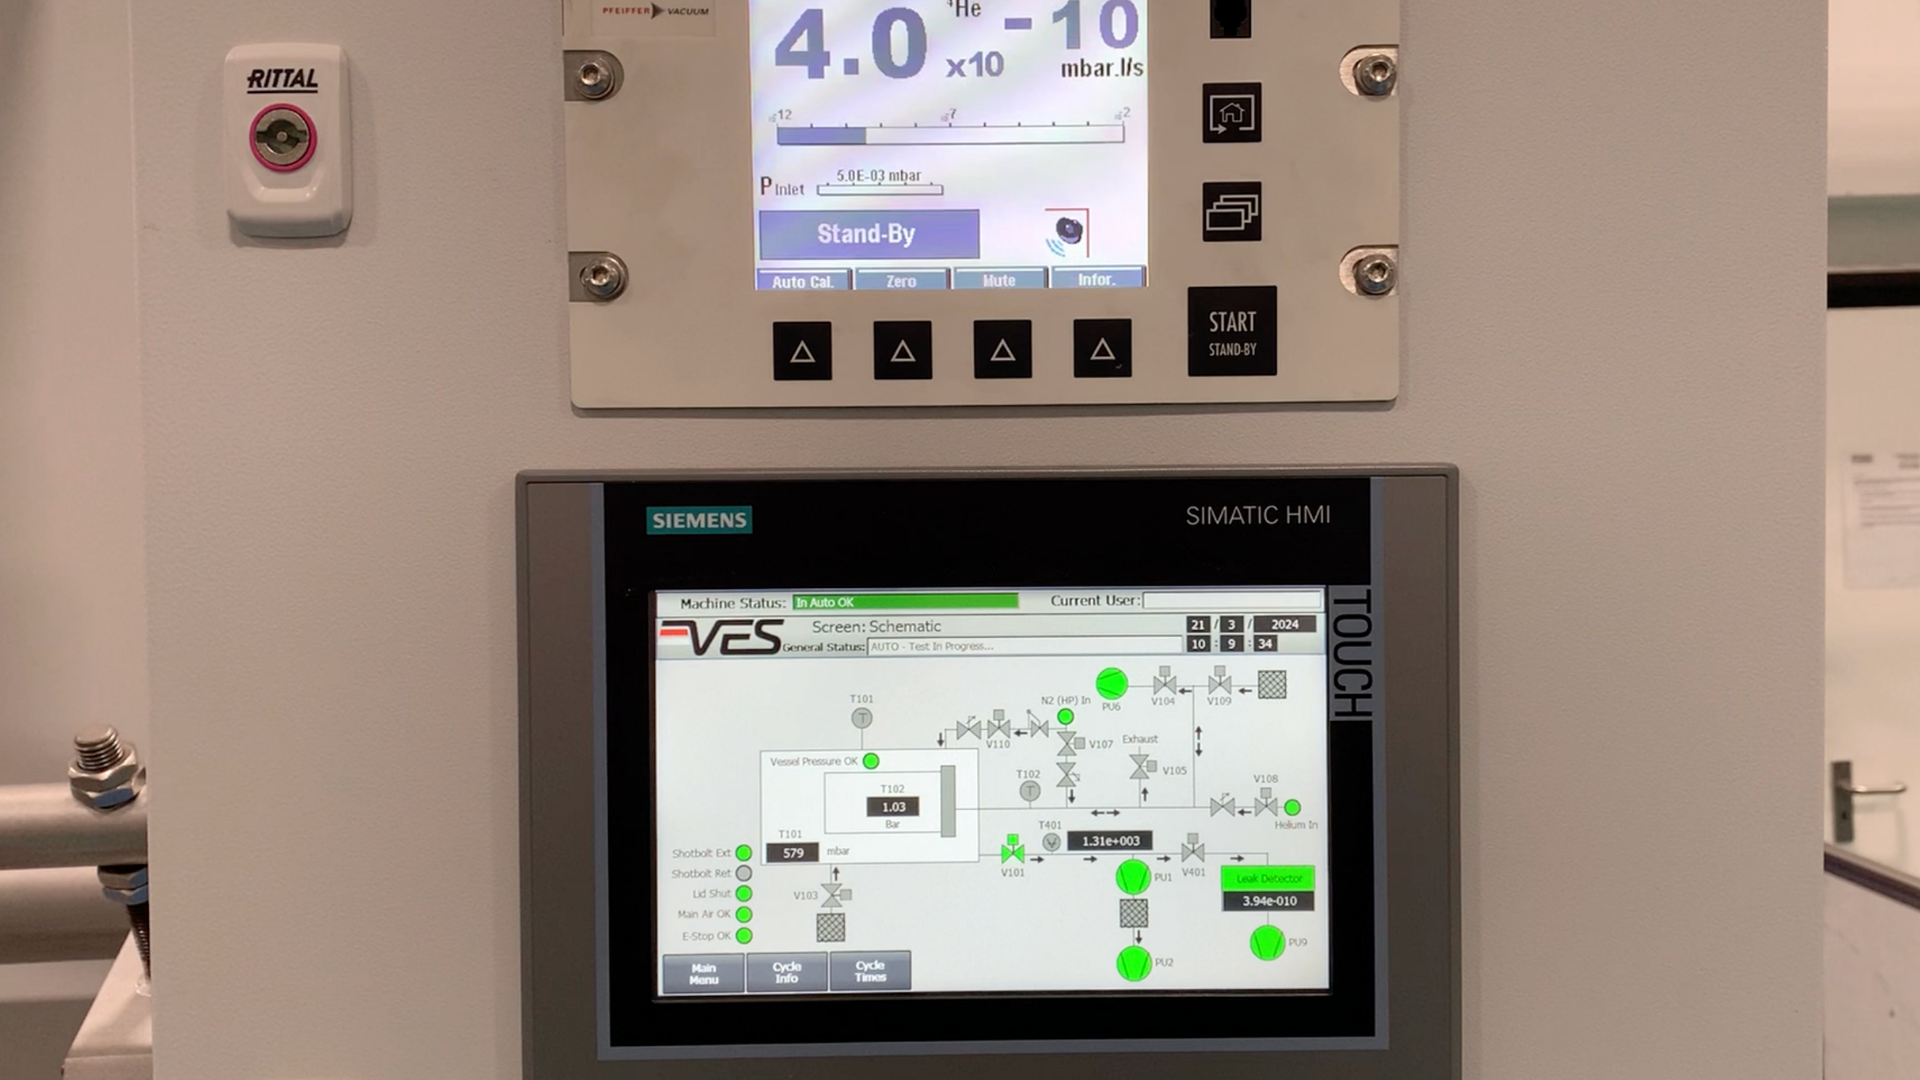
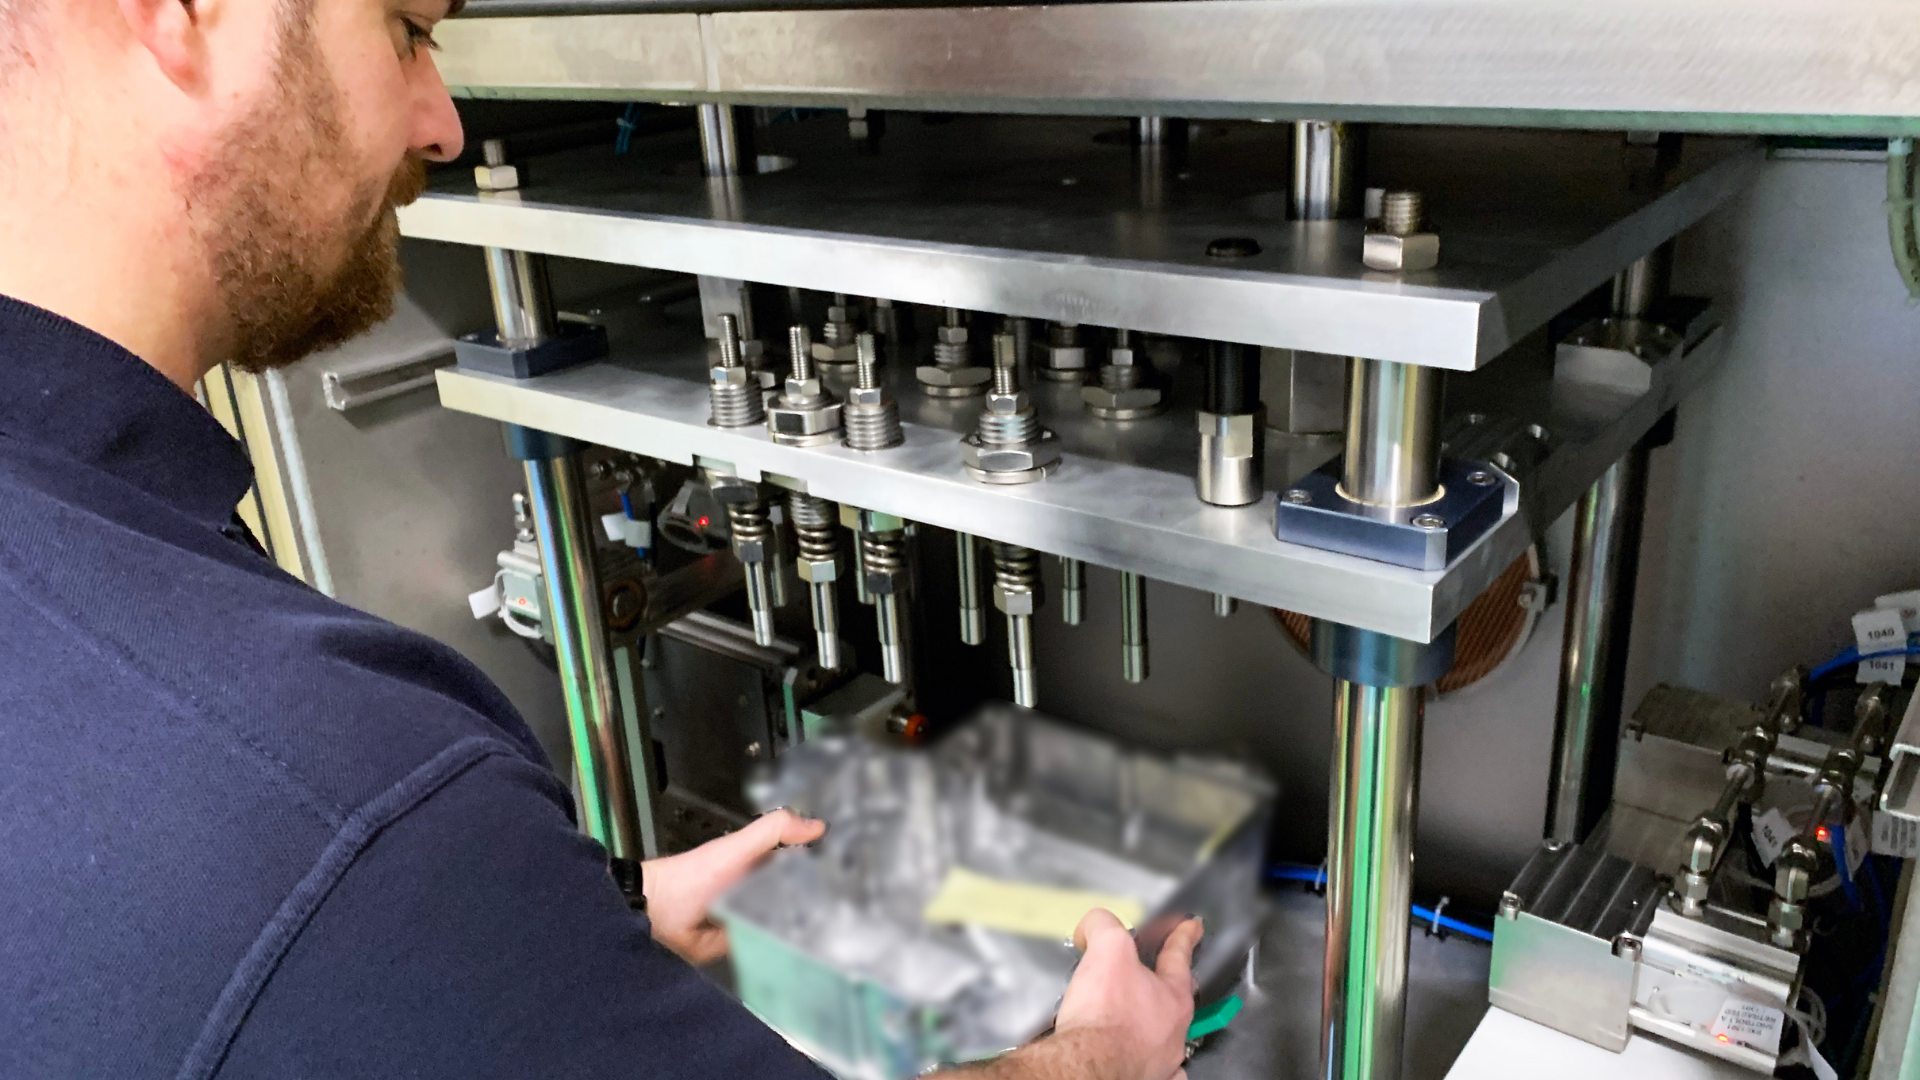
Here’s how it works. You pressurise a part using air or an inert gas like nitrogen, seal it off from the pressure source, and then monitor for any drop in pressure over time. If the pressure stays steady, you’re in the clear. But if it drops, that usually means there’s a leak, and how quickly it drops tells you how big the leak might be.
It’s simple, doesn’t need expensive gases, and you don’t need high-end equipment to get started. That’s why many still rely on the Pressure Decay Method for basic leak detection tasks.
Why Choose Pressure Decay?
Easy to Use: It’s a straightforward method. Small footprint, minimal training, and no complicated machinery to worry about.
Budget-Friendly: Because it doesn’t need specialised gear, it’s a great fit for smaller manufacturers or anyone trying to keep testing costs down.
No Mess: Since it’s a dry test, there’s no need to dry components afterwards—unlike methods like bubble testing.
What Are the Limitations?
Now, pressure decay isn’t perfect. There are some trade-offs to be aware of:
- Not Super Sensitive: It’s not great for detecting tiny leaks. Its sensitivity is around 10⁻² mbar·litre/sec, which is fine for many applications, but not for ones needing ultra-precise results.
- Takes Time: You have to let the pressure stabilise before measuring, which slows things down, especially with large components.
- Sensitive to the Environment: Changes in temperature or humidity can throw off results, leading to false readings.
- No Leak Location Info: It tells you there is a leak, but not where it is.
- Volume Changes Can Affect Accuracy: Pressurising a part can slightly change its shape or volume, which might impact the results.
- Slower Throughputs: Particularly with bigger parts, the process can drag a bit.
For applications needing greater sensitivity or faster cycle times, vacuum decay testing can offer a viable alternative. Learn more in our detailed comparison.
When’s the Best Time to Use It?
Pressure decay is perfect when you’re testing a high number of parts with moderate leak rate requirements. Think automotive parts like intake manifolds or fluid reservoirs, HVAC components, or even certain consumer or medical products.
It’s also a smart move as a first step in leak testing. By spotting any obvious leaks early, you avoid wasting expensive tracer gases like helium. That’s a big win if you’re trying to keep things running smoothly and cost-effectively.
For general checks, say, testing valves, seals, or housings, it does the job well. But if you’re dealing with more sensitive components like hydrogen fuel systems or sterile medical gear, then you’ll want to use something like helium vacuum testing for that finer level of detail.
Getting More from What You’ve Got
Pressure decay is evolving, too. New digital sensors and control systems are helping improve its accuracy and automation potential. So, if you’ve already got a pressure decay setup, it might be worth looking into retrofits. You can increase performance and keep up with tighter industry standards without needing a full equipment overhaul.
Picking the Right Method
Leak testing isn’t one-size-fits-all. The best method depends on what you’re testing, how precise you need to be, and how fast you need the results. Pressure Decay Method is still a great choice when you want a balance between cost, ease, and efficiency.
Whether you’re running a small test station or a full-scale production line, we’re here to help you decide if pressure decay is the right fit, or if it’s time to explore another method.