You’ve probably heard it before, but we’ll say it again: as AI workloads drive up rack power densities, traditional air cooling just isn’t cutting it anymore. Here at VES, we’re seeing more and more data centres switching to liquid cooling, whether it’s direct, hybrid, or full immersion. It’s a smart step forward for handling heat more efficiently, but it also brings a real risk with it: leaks.
Even the tiniest leak can lead to bigger issues. We’re talking about damaged hardware, warranty claims, and unplanned downtime. So let’s walk through the key components that absolutely need to be leak-tested, why it’s so important, and how you can put together a leak testing plan that protects your systems, your uptime, and your peace of mind.
Why Liquid Cooling Brings New Risk
Switching from air to liquid isn’t just a tweak. It’s a shift in complexity. Modern AI-focused servers dump a ton of heat. Air can’t always push it away efficiently. Liquid cooling offers much better thermal control and efficiency, so many operators are embracing it. But unlike airflow, liquid leaks are silent troublemakers.
Liquid cooling systems typically include cold plates, manifolds, coolant distribution units (CDUs), pipes, valves, sensors, heat exchangers and more. Each junction, weld or seal is a potential leak point. A failure in any one component can ripple through the entire rack. That’s why leak testing at multiple stages is not optional. It’s essential.
Which Components Need Rigorous Leak Testing
Below are the components most critical from a leak perspective. If you skip any of these, you’re asking for trouble.
1. Cold Plates & Cold Plate Assemblies
These are the front line. They’re mounted right on the CPUs, GPUs or other hot components. They often have microchannels, brazed joints and interfaces between dissimilar materials. A leak here is especially dangerous because it’s so close to the electronics.
2. Manifolds / Distribution Headers
Manifolds distribute coolant to branches or zones, so they tend to be complex with multiple ports and welds. Each interface (branch, weld, O-ring joint) is a candidate for leakage. Because of that complexity, these often require 100% leak validation.
3. Coolant Distribution Units (CDUs)
Think of a CDU as the “brain” of the loop. It manages flow, pressure, temperature and often houses valves, sensors, expansion volumes and internal plumbing. If a leak hides inside a CDU or at a sealing interface, it can undermine the whole rack.
4. Piping, Tubing & Flexible Hoses
These are the “plumbing” between cold plates, manifolds and CDUs. Leaks tend to crop up at welds, transitions, push-to-connect joints or hose heads, especially when pressure or temperature changes.
5. Valves, Check Valves, Control Elements
Every valve body has seals, stem packings and seating surfaces. Under static or dynamic pressure, these must hold. Otherwise, you’ll see leakage or drift when you least expect it.
6. Heat Exchangers / Plate Heat Exchangers
Often used to isolate rack coolant loops from building coolant loops, these units have internal plates, gaskets and brazed joints. Differential pressure across the exchanger is a risk, so integrity is essential.
7. Sensors, Ports & Fitting Interfaces
It’s easy to overlook small penetrations. Things like pressure or temperature sensors, threaded ports, O-ring seals and quick-disconnects. But failures here are insidious. They often show up later, after deployment.
8. Reservoirs, Accumulators & Expansion Vessels
These buffer against thermal expansion and contraction. Their welds, fill ports and interface connections must be solid or slow leaks can develop over time.
9. Connectors & Quick Disconnect Fittings
For modularity or maintainability, many systems use quick disconnects. These have to stay leak-tight even after repeated connect and disconnect cycles. Testing them in situ (while assembled) is non-negotiable.
Where & How to Test
If you leave all testing to the final stage, you’ll be repairing after failure. Instead, spread your checks across the manufacturing timeline. Here’s how:
- Component-Level Leak Test
Before anything’s assembled, test the raw parts. That means cold plates, heat exchanger cores, manifolds and the like. - Subassembly-Level Test
Once you add valves, sensors, fittings and so on, do a test on that subassembly before going further. - System-Level / Final Test
After integration into CDUs or rack loops, run a full-loop test under expected pressures or with tracer gas or vacuum. This is your final sanity check. - Post-Environmental Stress Test
After you’ve exposed the assembly to thermal cycling, vibration and pressure cycling, re-test. You want to validate that nothing degraded under real-world stress.
This layered approach helps catch defects early, reduce rework and prevent nasty surprises in the field.
Leak Testing Best Practices
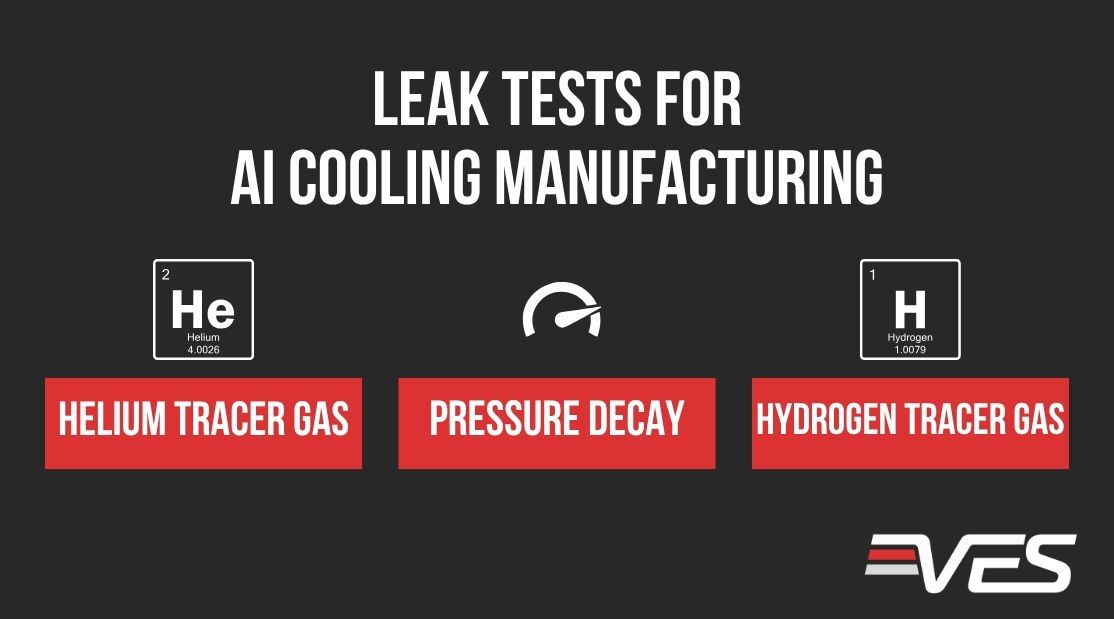
- Use helium mass spectrometry if you need micro-leak sensitivity (up to 10⁻¹² mbar·L/s or better)
- Employ sniff and vacuum modes to localise leaks
- Control background gas levels so you don’t get false positives
- Automate where possible with robot probes, multiplexing and so on
- Log all test results back to serial numbers or part IDs. Traceability matters
- Design with testability in mind. Make ports accessible and venting paths clear
- Establish retest protocols after refurbishment or stress, re-validate
Industry leaders say leaks in cooling components are a significant failure vector. Improved test discipline isn’t extra work. It’s the difference between reliability and chronic headaches.
Why Leak Testing Isn’t Optional
Here at VES, we believe that when it comes to data centre cooling, it’s the invisible things, like micro-leaks, that can hurt you most. Every component from cold plate to CDU must be leak-verified. The supply chain has to embrace a disciplined, multi-layer test strategy if you want to protect performance, reputation and uptime.
Not sure where to start? Get in touch with our team, we’re here to help you build a leak testing strategy that’s solid, scalable and stress-free.
Want help creating a leak testing roadmap or checking if your system’s up to scratch?
Get in touch with us at VES. We’re here to make sure your cooling system performs exactly as it should. Leak-free. Stress-free.